

How To Clean Surface Pro Charging Port
Introduction
How to remove and replace Microsoft Surface Pro 4 Battery.
-
-
Before you begin, discharge the Surface Pro's battery below 25%. A charged lithium-ion battery can catch fire and/or explode if accidentally damaged during the repair.
-
Make sure the device is turned off before you start working on it.
-
If your display is cracked, cover it with strips of packing tape to contain any glass shards and prevent injury.
-
-
-
The display is strongly glued to the frame of the device.
-
To remove the display, first soften the adhesive by applying heat. You can use a heat pad, heat gun, or iOpener. In a pinch, a hair dryer can also work.
-
Be careful when using a heat gun, as too much heat can permanently damage the display.
-
Steadily and evenly heat the perimeter of the display until it's too hot to touch, and try to maintain that temperature for several minutes—but don't overheat it, or you may damage the display.
-
-
-
Use a suction cup or an iSclack to pull up on the glass and create a slight gap between the glass and the metal frame.
-
If your display is badly cracked, a suction cup may not adhere. It may help to first cover the display with a layer of packing tape. Alternatively, you can superglue your suction cup to the display.
-
Insert an opening pick into the gap.
-
There are tabs on the upper right side and upper left side where it is easier to get a tool under the display.
-
Slide an opening pick around the sides and bottom of the display to cut the adhesive. Apply more heat as needed.
-
The tape is much thinner on the bottom edge than the other three sides. Do not push the tool in too far or you will damage the screen permanently.
-
Work carefully—the glass is thin and will crack easily if you try to force it.
-
Separate the top edge last. There are antennas on both sides, so be careful not to damage them. If needed, you can use a bit of isopropyl alcohol to help weaken the adhesive.
-
-
-
Attach a suction cup to the front of the display.
-
Using the suction cup, pull the display and base apart. You may need to hold the base in position with your hands.
-
It is usually better to place the suction cup on the left or right side of the screen, rather than in the center. This provides more leverage when removing the screen.
-
-
-
There are two display cables connecting the body to the display.
-
Disconnect the cable on the right by putting a plastic opening tool under the edge of the connector and prying it up.
-
-
-
The connection for the strip on the left is covered by a lightweight metal casing. Pry around the edges of this case with a plastic spudger. Once it is loose, pull it off.
-
Unplug the connection with a plastic opening tool.
-
-
-
The display should now be free of the body of the Surface Pro. Lift it up and away from the rest of the device.
-
Before installing a new display, check it carefully to see if any parts need to be transferred over from the back of the old display to the new display. In particular, you may need to transfer over the NTrig board in the corner by disconnecting the two attached ribbon cables and using heat and gentle prying to carefully separate the glue securing the board.
-
To replace the adhesive securing the display, carefully remove any old adhesive from both the device and the back of the display. Clean and prep the surface with isopropyl alcohol and a lint-free cloth, swiping the cloth in one direction (not back and forth). Apply a strong double-sided tape, such as 2 mm Tesa 61395.
-
-
-
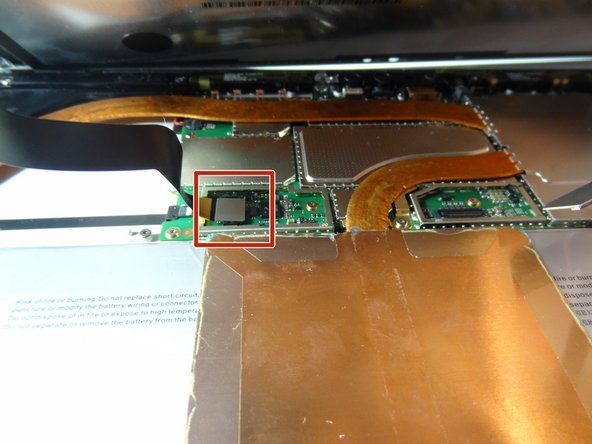
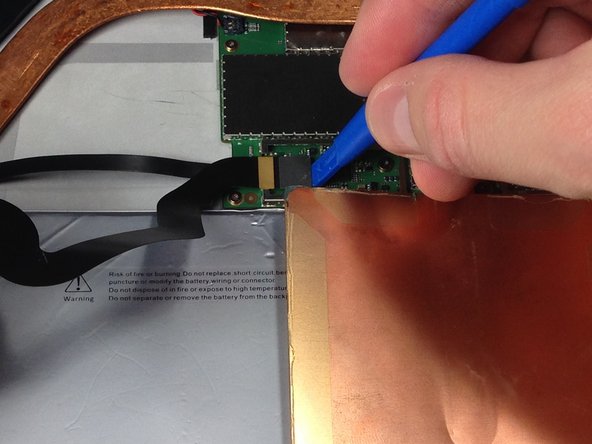
Both sections of the heat sink are connected to the motherboard via a panel which is covered by a metal casing.
-
Remove the casing by prying around the edges and then lifting the entire piece once it is loose.
-
-
-
Remove the four 1.5mm Torx T5 screws holding the main body of the heat sink to the motherboard
-
-
-
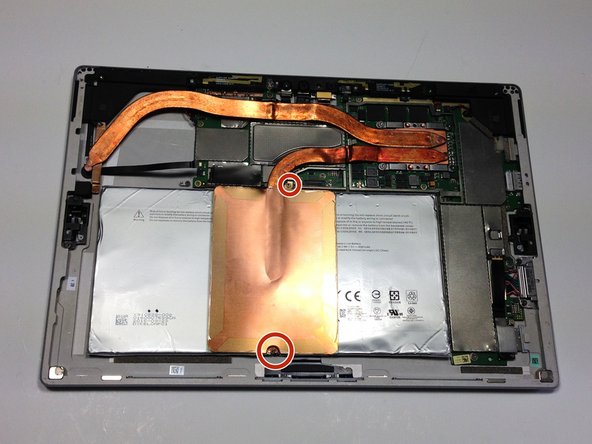
Remove the two 1.5mm Torx T3 screws holding the copper plate near the middle of the device.
-
-
-
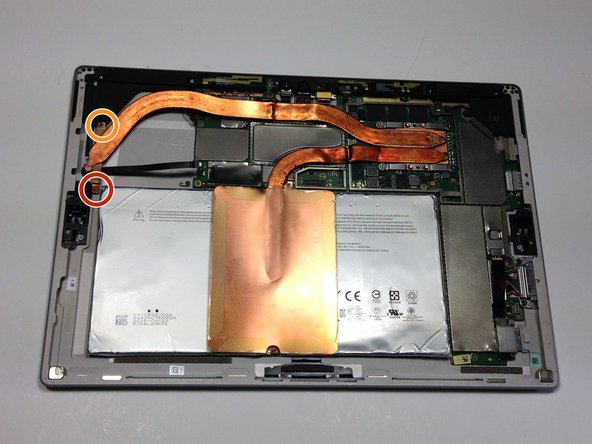
Remove the 1.5mm Torx T4 screw holding the heat sink tubing to the frame of the device.
-
Remove the 3.0mm Torx T4 screw.
-
-
-
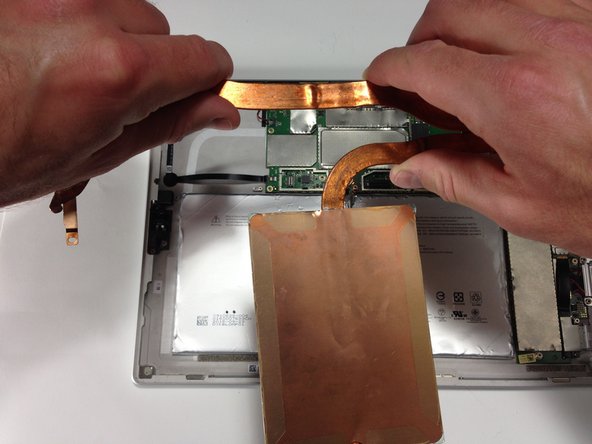
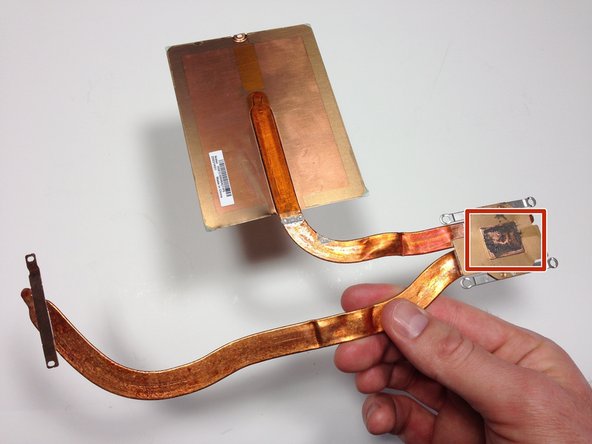
You can now remove entire heat sink by lifting it out with your hands.
-
Be sure to replace the thermal paste when installing the heat sink.
-
-
-
Disconnect black wire from motherboard.
-
-
-
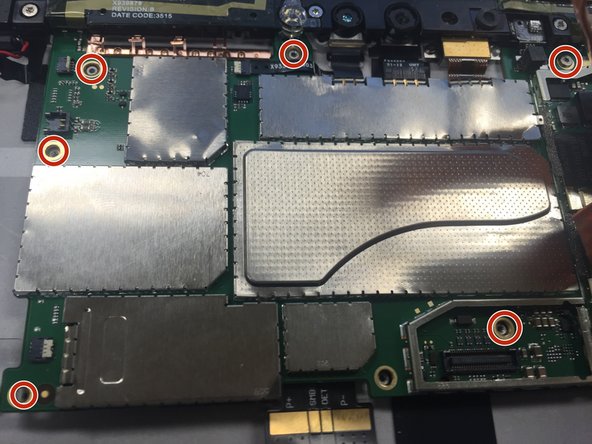
Remove the six 1.5 mm Torx T3 screws securing the motherboard.
-
-
-
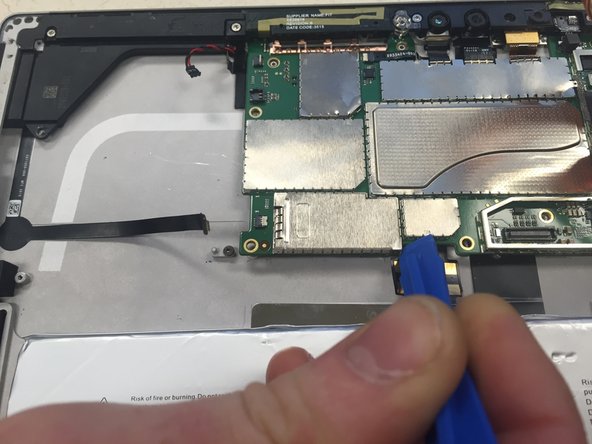
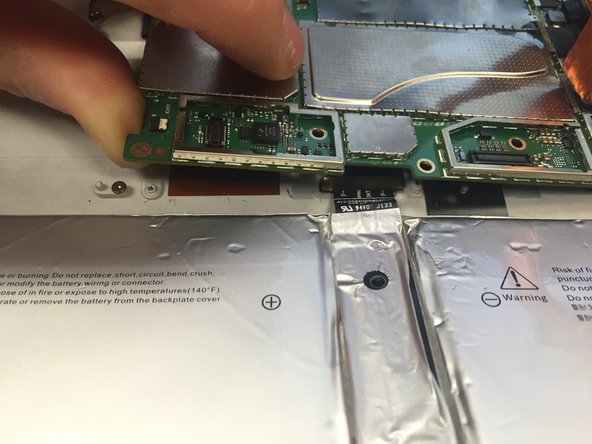
Use plastic opening tool to remove metal casing at the bottom left corner of the motherboard.
-
-
-
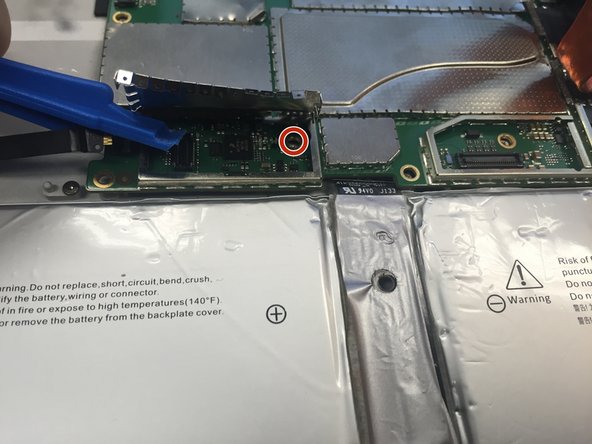
Remove remaining screw.
-
2.0 mm Torx T4 screw.
-
-
-
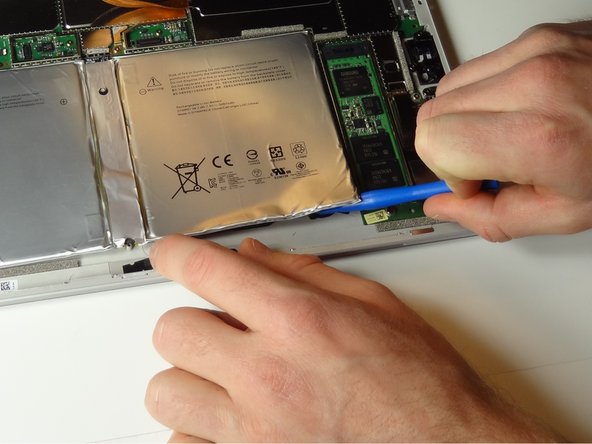
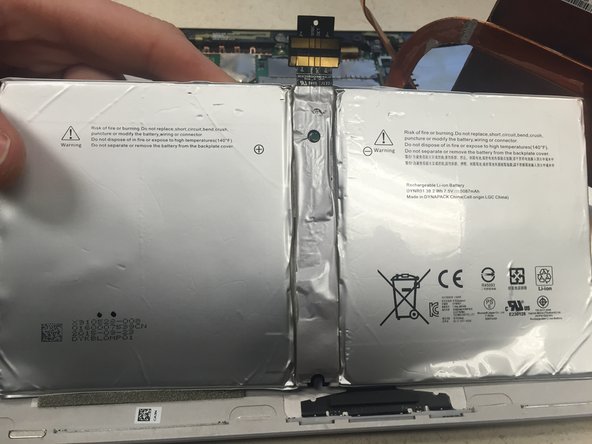
The battery is attached to the device by strong adhesive tape. Use a plastic opening tool to pry around the underside of the battery.
-
Peel the battery up and away from the bottom of the device.
-
Do not use metal tools for this step. the battery can leak harmful substances if punctured.
-
-
-
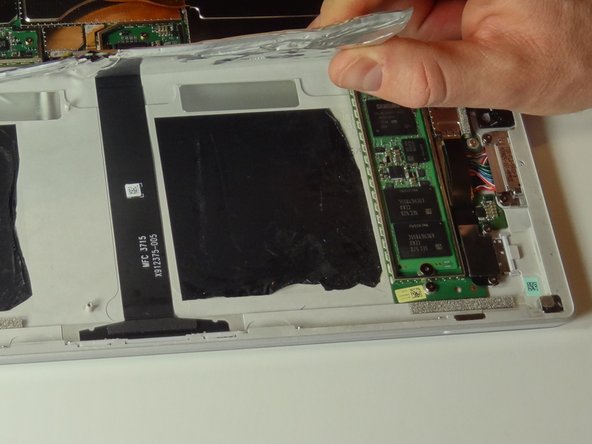
In order to prevent a short circuit, insert a piece of cardboard, paper or plastic between the battery connector and motherboard before sliding the battery cable out from under the motherboard.
-
Also be careful to protect the motherboard from shorts while placing the cable for the new battery.
-
Detach the battery from under the motherboard. Remove from the device.
-


Conclusion
To reassemble your device, follow these instructions in reverse order.
Embed this guide
Choose a size and copy the code below to embed this guide as a small widget on your site / forum.
Preview
How To Clean Surface Pro Charging Port
Source: https://www.ifixit.com/Guide/Microsoft+Surface+Pro+4+Battery+Replacement/60358
Posted by: mosleylerning.blogspot.com
0 Response to "How To Clean Surface Pro Charging Port"
Post a Comment